

Remodeling Contractor in Cedar Rapids & Marion, Iowa | Madison’s Homes
Looking for remodeling contractors in Cedar Rapids or Marion, Iowa? I’m Patrick Madison, owner of Madison’s Homes in Center Point. I remodel bathrooms, kitchens and basements and build home additions throughout Cedar Rapids, Marion and nearby communities. I’m a licensed Iowa master plumber with more than 40 years of hands-on construction experience.
Want to trade a bathtub for a walk-in shower, move the kitchen sink to an island, or add a bathroom downstairs? I can look at the framing and plumbing together and walk you through what it would take in your house.
When you text, include your town, a photo of the room and what you’d like to change.
Licensed master plumber • Insured & bonded • Over 40 years of construction experience
Remodeling Contractors Serving Cedar Rapids and Marion, Iowa
Explore Our Home Addition Construction Chapters
Moving the propane tank

On this addition, the first job was already sitting in the yard. The propane tank occupied space the crew needed to open up for construction. That’s why the documentary starts out here before you see a shovel go into the ground.
When I walk an addition site with a homeowner, I like to stand where the outside corners will be. From there you can usually see which parts of the yard will become the building and which parts the excavator will need just to get around it.
A propane move takes coordination with the supplier. The tank needs a suitable location, the delivery truck still needs access, and anyone relying on propane needs to know when service will be interrupted.
Excavation

Excavation is where the outline of the addition becomes a hole you can actually stand beside. The footprint tells us where the walls belong. The dig also has to leave room outside those walls for foundation work and drainage.
One detail homeowners notice right away is the pile of dirt. Some soil may be needed again for backfill, so where it lands matters. A pile in the wrong spot can block the very route needed to bring in stone or concrete.
As you watch, look at the excavation in relation to the existing house. The elevation of the new floor has to tie into the old one, and the work below it has to fit within that same plan.
Tanks, corrugated tubing, perimeter drain system

This chapter puts three buried pieces of the project in view together. The tanks occupy part of the site, the corrugated tubing follows a route through it, and the perimeter drain follows the foundation.
A pipe disappearing into the ground is hard to identify once the yard is finished. I find it helpful to trace each run while it’s exposed and record where it starts, where it goes and what it serves.
Watch this chapter for the layout. A little farther into the video, the stone chapter gives you a closer look at how water gets to the perimeter drain.
Foundation Spread Footings

The foundation carries the addition down to the ground. The footing spreads the load beneath the wall, and the top of the wall establishes the surface the framing will sit on.
On an addition, the existing house gives you a fixed point to work from. The new floor needs to meet the old floor at the intended height, and openings drawn on paper need to land where the two structures connect.
Look at the top of the foundation as you watch. It’s a good place to see how a decision made during concrete work carries forward into the first floor of the addition.
Concrete Basement Wall Forms

The spread footings are in place before the wall forms go up. The forms give the wet concrete its shape and establish where the inside and outside faces of the basement wall will be.
A basement window is a useful detail to follow here. Its opening has to be located while the wall is being formed. After the pour, the framing and window have to fit that opening.
Look at the space the forms occupy around the foundation. Once they come off, the outside face is accessible for the wall liner shown in the next chapter.
Exterior basement wall liner

The best time to see the outside face of a basement wall is before the soil goes back. This chapter shows the exterior wall liner while you can still see where it sits against the foundation.
The face of the wall is only part of the job. Corners, penetrations and the edges of a liner are places where the treatment changes direction or meets another material.
Follow the liner down toward the base of the wall in the footage. The next chapter picks up there with the stone and perimeter drainage that will also disappear under the backfill.
How the drainage system works with the stone

Think about the path of one drop of water beside the foundation. The spaces between pieces of drainage stone give water room to move toward the drain at the base of the wall.
The stone and the pipe do different jobs. Water can travel through the stone bed, then the pipe gives collected water a route to the system’s discharge point. Following both parts makes the layout easier to understand.
This is a useful scene to revisit if you’re trying to make sense of an old construction photo. Look for the bottom of the wall, the stone around it and the direction the drain runs.
Framing

Framing is when a floor plan starts to feel like rooms. You can stand in a doorway, look across the space and see how the new addition connects to the house.
Openings matter as much as the solid parts of a wall. A door needs room for its frame and trim. A wall that will carry cabinets or closet shelving may need backing where the fasteners will land.
In the framing chapter, follow one opening from the floor up. It’s easier to recognize the sill, studs and header now than it will be after the insulation and drywall cover them.
Setting Trusses alone

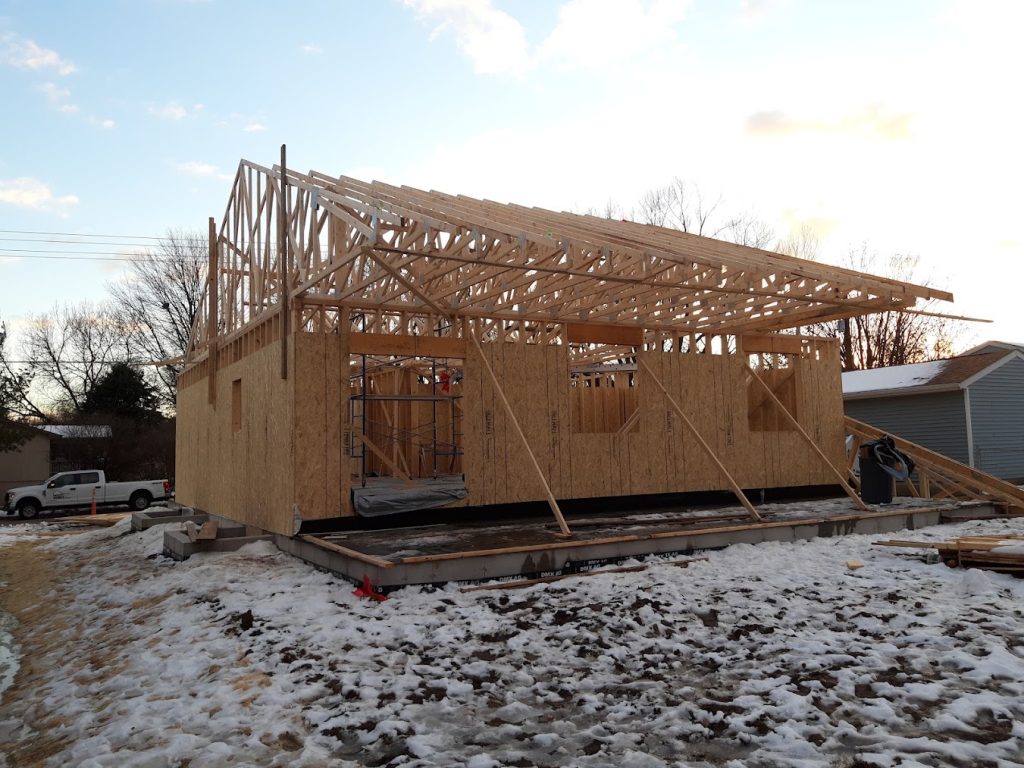
Roof trusses span the building and establish the roof shape. On paper they look like a row of identical triangles. On site, their length and the space around the building affect how they can be placed.
The chapter title records how this particular job was filmed. Truss placement is a lift-planning decision for each site, including equipment, crew, weather and the truss supplier’s bracing instructions.
Watch the change in the roofline as the trusses go into position. You can start to picture both the space enclosed by the roof and the overhang that extends beyond the wall.
Building stairs

A staircase has to join two finished floors comfortably. The total rise is measured between those floors, so the thickness of flooring at both ends matters while the stairs are still being laid out.
The opening above the flight matters too. When you look at a staircase from the side, you can see why headroom, the landing and the direction of travel all belong in the same conversation.
In this chapter, look at the first and last steps in relation to the floors they meet. Those two places are where a later change in flooring is especially noticeable underfoot.
Furnace

A furnace needs a place in the floor plan, and so do the routes that carry air to and from the rooms. A location that looks convenient on paper can take up valuable ceiling space once the ductwork is included.
In a basement remodel, I like to walk the future hallway and look overhead. A main duct running across the hall can affect the ceiling for its whole width, while another route may fit the layout better.
Watch the furnace chapter with future service in mind. Picture someone coming back after the walls are finished to change a filter or reach a service panel.
Plumbing

This plumbing chapter covers the drain, waste and vent side of the addition. A fixture location in a finished room has to work with a route for the piping hidden in the floor and walls.
A kitchen sink is a good example. Moving it from a wall to an island changes the space available for the drain and vent, even when the two sink locations are only a few feet apart.
As you watch, trace a branch back from a fixture location toward the larger piping. The following chapter shows the other half of the job, bringing clean water to the fixtures.
Potable water

Potable water is the clean water delivered to sinks, showers and other fixtures. Here the focus shifts to the supply lines that bring water to the point where you turn on a tap.
Fixture placement affects the last few feet of every run. Under a vanity, water connections have to share space with the drain, the drawers and the shutoff valves you may need to reach later.
Look at these routes while the framing is still open. Photos taken from the doorway and then close up can help a homeowner locate concealed piping after the walls are finished.
Hanging Drywall

Hanging drywall gives the framed rooms their wall and ceiling surfaces. The edges of each sheet also establish the joints that will need tape and compound later.
A long factory edge and the cut end of a sheet finish differently. The factory edges have a shallow recess for the joint treatment. A butt joint needs a wider finish to make the transition hard to see.
Watch for where the sheets meet around openings and across long walls. Later in the documentary you can see those same kinds of seams disappear during taping and mudding.
Concrete Patio and approach

A patio and a concrete approach both need to meet something that is already there. At a door, the landing height affects how the step feels. At an approach, the slab has to meet the surface people walk or drive across.
Before a pour, I like to look at the forms from the door and then from the yard. It’s easier to picture where rainwater will go while the edges and elevations are still visible.
As you watch the concrete chapter, pay attention to the edges of the slab as well as the finish. The connections to the house, yard and adjoining surface are what you’ll notice in everyday use.
Setting Corner Steel for Drywall

Corner steel, also called corner bead, gives an exposed drywall corner a straight edge and helps protect it from everyday knocks. You’ll see it at an outside corner where two finished faces meet.
The nose of the bead becomes a reference for finishing both faces. A bend in that line can catch the light all the way down a painted corner, so this detail deserves attention before the compound covers it.
This short chapter comes immediately before taping and mudding. Watch the corner while the metal is visible, then compare it with the wider finished surface in the next scene.
Taping and mudding drywall

Taping bridges the joints between drywall sheets. The first pass beds the tape in joint compound. Later coats spread the transition farther out so the joint blends into the face of the board.
On long seams I can use an automatic taper, then a flat box for the finish coats. Inside corners, butt joints and fastener heads each need a different touch. A box that works well on a long flat seam doesn’t do every part of a room.
Side lighting is one of the best ways to see a ridge before paint goes on. In this chapter, look at the width of the finished band compared with the narrow seam it started from.
Watch the drywall taping and mudding
Making Toe Kick Diffusers

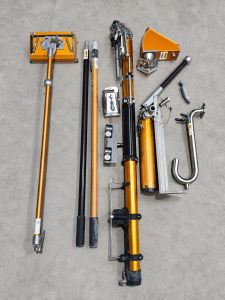
The toe kick is the recessed space beneath a base cabinet. On this addition, a heating outlet had to share that space with the cabinet base. The short sheet-metal piece in the photo carries air to the grille at the front.
The cabinet fixes three dimensions before the metal goes in: the height of the recess, its setback from the doors and the distance to the floor outlet. Those dimensions determine where the diffuser meets the finished face.
This chapter shows the fitting while you can still see its shape on the bench. In the next chapter the cabinets go into position, concealing the connection behind the toe kick.
Setting Kitchen Cabinets

In a kitchen, the cabinet drawing has to work for the person using the room. I like to start at the sink and picture where you’ll set groceries, prep food and put clean dishes away.
Then open the doors on paper. A dishwasher door takes up aisle space, a corner cabinet needs clearance, and a drawer beside the sink needs to miss the plumbing inside the cabinet.
Use this chapter to look at the kitchen as a room you’ll move through. The following scene narrows the focus to one detail you notice every evening, the lighting at the cabinets.
Kitchen cabinet lighting

Cabinet lighting puts light close to the counter where you cut, measure and read. If your ceiling light is behind you at the sink, you can see the difference just by noticing where your own shadow falls.
The underside of a cabinet has a front edge, joints and sometimes a trim rail. These affect whether the light source is visible when you sit down and whether light reaches the front of the counter.
In this chapter, look at the surface being lit as well as the cabinet itself. A glossy backsplash or countertop can reflect a fixture that looks completely hidden when you’re standing up.
Siding

Siding is the finished exterior face of the addition. Long courses are easy to see from the street, but the smaller details show up where a wall meets a window, a door, a roof or the original house.
On an addition, matching the existing exterior takes more than finding a similar color. The profile, the exposure of each course and the depth of the surrounding trim all affect the finished appearance.
As you watch, follow a horizontal line across the wall toward an opening. That’s an easy way to see how the siding layout and the trim relate to one another.
Closet organizers

Closet organizers turn an empty recess into usable storage. Before choosing shelf heights, I want to know what actually goes there. Winter coats, folded bedding and work boots all use the space differently.
The door opening limits what you can reach. A deep shelf tucked behind the side of a narrow opening might hold plenty on paper and still be inconvenient every morning.
Watch this chapter from the viewpoint of someone standing in the doorway. Picture reaching the top shelf, lifting a hanger off the rod and pulling something from the far corner.
Certificate of occupancy

The documentary closes with the certificate of occupancy. It marks the local approval for occupancy on this addition, after the work has progressed from a propane tank in the yard to finished rooms.
For the homeowner, the closeout paperwork and the final walkthrough serve different purposes. The walkthrough is a chance to try the doors and drawers, run the fixtures and ask where the shutoffs and service access points are.
This final scene puts the paperwork in the context of the whole build. If you want to revisit something that is now hidden, the chapter index takes you back to the framing, mechanical work or piping while it was still exposed.
Bathroom Remodeling in Cedar Rapids and Marion – Madison’s Homes Remodeling Contractors
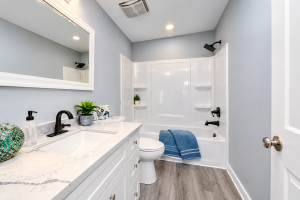
What bothers you about your bathroom now? Maybe you’re tired of stepping over the tub, the vanity crowds the doorway, or the room has two sinks and nowhere to set a towel. Each calls for a different amount of work.
If the layout works and the tub is the problem, start with bathtub replacement and tub-to-shower conversions. If you want to move the shower or rebuild the whole room, I’ll look at the drain location, water lines, framing and floor with you. Then we can talk through what can stay, what needs to move and how long you may be without the bathroom.
Kitchen Remodeling Contractors in Cedar Rapids and Marion – Cabinets, Plumbing and Island Sinks
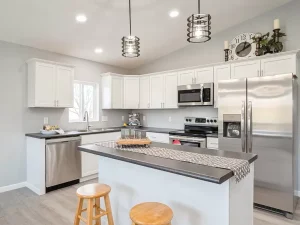
Before ordering cabinets, decide where you want to stand when you prep food and where you set a hot pan. Keeping the sink on its current wall and moving it to an island are two different jobs, even if the cabinet drawings look similar.
For an island sink, I look at access below the floor and the route for water, drainage and venting. Those decisions affect the cabinet layout and the work in the ceiling below. If all you need is a sink, faucet or disposal changed, see my Cedar Rapids plumbing services.
Basement Framing and Mechanical Rough-In – Remodeling Contractors in Cedar Rapids and Marion, Iowa
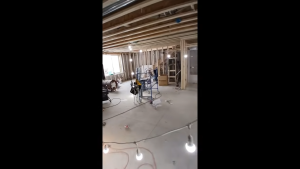
Our remodeling contractors begin basement projects by planning the layout, framing interior walls, and preparing the mechanical systems before drywall installation. As a remodeling contractor serving Cedar Rapids and Marion, Iowa, Madison’s Homes documents the construction process, including exposed ceiling joists, wall framing, plumbing, heating, and electrical rough-in.
Our remodeling contractors in Cedar Rapids and Marion plan basement framing to provide space for future bedrooms, bathrooms, storage, and living areas. Plumbing drains, water supply lines, ductwork, and electrical wiring must be coordinated before insulation and drywall cover the walls and ceilings.
Watch Basement Framing and Mechanical Rough-In
Basement Finishing and Basement Bathrooms – Remodeling Contractors in Cedar Rapids and Marion
Watch Basement Finishing Video
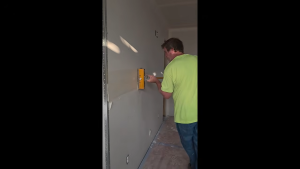
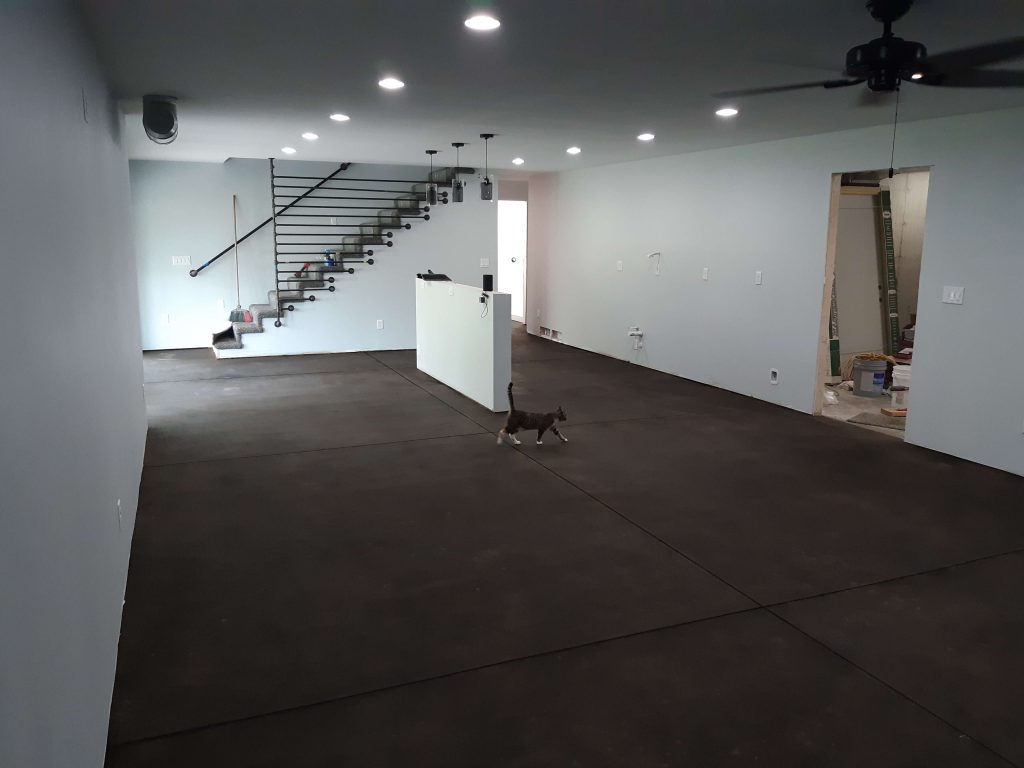
Our remodeling contractors serving Cedar Rapids and Marion help homeowners plan basement finishing projects around how they want to use their downstairs space. A family room, guest space and bathroom raise different questions about headroom, daylight, moisture and access. I’d want to see any past water marks before we cover the walls.
For a basement bathroom, the drain location can change where it makes sense to frame the walls. If there’s an existing rough-in, send a picture showing the pipes and the nearest wall. If you’re building a new basement, see my footings and concrete basement walls.
Home additions & porch framing
An addition starts where the new room meets the existing house. Floor heights, the opening between rooms, the roof connection and the path for water away from the house all belong in the early conversation.
I filmed a six-month addition from the ground up. Watch the home addition from the beginning: moving the propane tank (0:00) or use the chapter index above to jump to the stage you’re planning.
Roofing, Windows & Doors
The building enclosure needs to work together to keep weather outside. Windows and doors must fit the opening and the surrounding wall assembly. Replacement options can involve retaining an existing frame or opening the wall for a different installation. Discuss the condition of the opening, exterior trim and interior returns before choosing the approach.
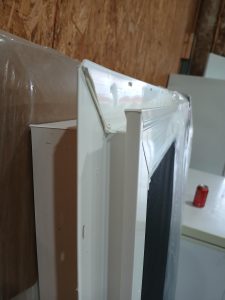
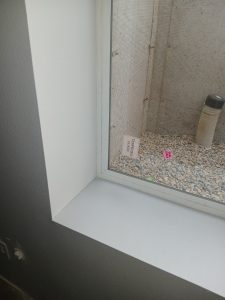
For a pocket replacement, I first look at the existing frame and sill. A sound frame can let us keep more of the trim. Where the frame needs repair, we talk about opening the wall, how a flanged window meets the siding, and whether the interior has wood casing or drywall returns. A photo from inside and another from outside help me see both sides of the job.
What will happen to the woodwork?
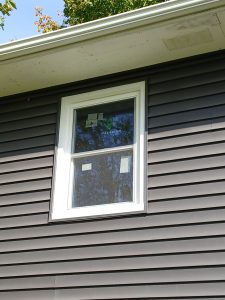
If you like your stained casing, tell me before we choose the unit. An insert fits inside a sound frame. It can keep the casing in place, though the extra frame takes up some glass area. Here’s the same kind of installation seen from both sides.
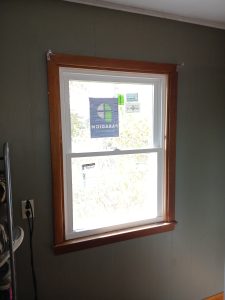
What should a full-frame estimate include?
When the sill is soft, I want to see how far the damage goes. A full-frame replacement gives us access to the opening. Ask what the estimate allows for framing repairs, flashing, matching the siding, rebuilding the interior returns and painting or staining the trim.
Before Hiring Remodeling Contractors in Cedar Rapids or Marion
How do I know if a remodeling contractor near me serves my town?
I’m based in Center Point and work in Cedar Rapids, Marion and nearby Linn County communities. Text me your town and a photo of the space. If you’re just outside the area, include the nearest town so I can confirm whether I can take the job.
Can I keep using the bathroom or kitchen?
Tell me if it’s your only bathroom or if you need the kitchen sink every evening. We can plan around demolition, water shutoffs and when fixtures can go back into service.
What affects the cost?
Moving a drain, repairing a soft floor or opening a finished ceiling changes the work behind the finished room. A photo and your priorities help us discuss which changes are worth pricing. Smaller repairs and partial remodels are welcome.
Tell me about your project
What’s the first thing you’d change about the room? Text me a couple of photos and your town, including if you’re in Hiawatha, Robins or Palo.